How to use a broach sharpener: A simple step-by-step guide
A dull knife is dangerous and frustrating in the kitchen. Good news? A pull-out knife sharpener (also known as a manual or handheld sharpener) can restore your kitchen knife to a sharp edge in just 2-5 minutes—even for beginners.
In this guide, we will show you the correct and safe way to use the most common broach sharpeners (level 2, 3, or 4 models).

Different popular broach sharpeners - choose the model that suits your needs.
What do you need?
· Brush-type tool sharpener (carbide, ceramic, or diamond coated grooves).
· Clean, dry kitchen knives (chef's knives, Santoku knives, utility knives, etc.)
· Stable platform
· Optional: Dishcloth (to prevent slipping)
Never use a broaching sharpener on serrated knives, very thin Japanese single-bevel blades, or extremely expensive custom knives unless specifically approved by the manufacturer.
Understanding the stage (the most common type)
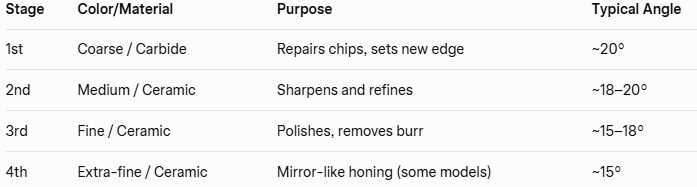
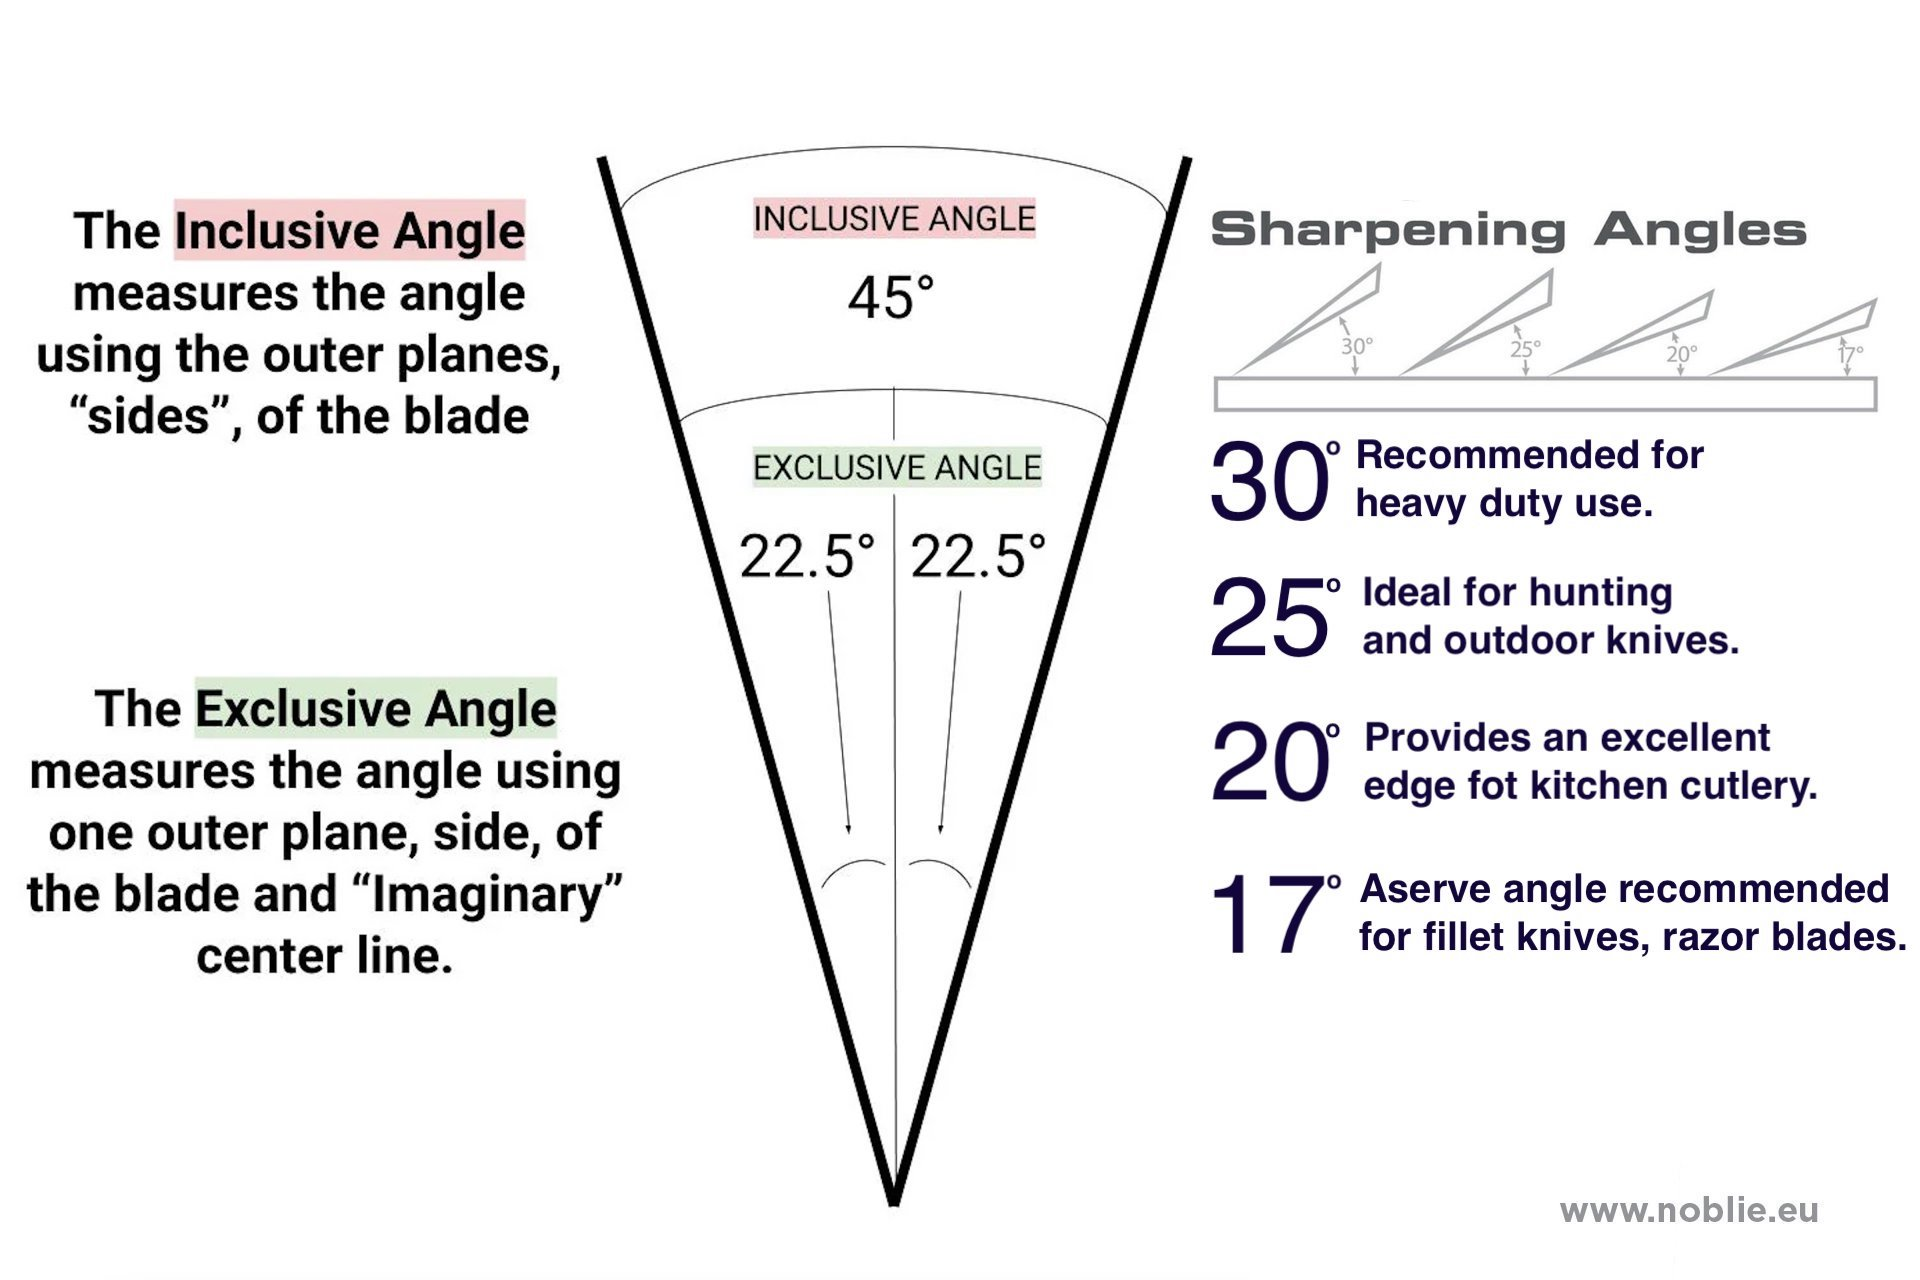
Sharpening Angle Guide: Quick Charts and Pro Tips
Common knife sharpening angles - Most pull-type knife sharpeners are preset to approximately 18–20° on each side.
Step-by-step: How to sharpen a knife
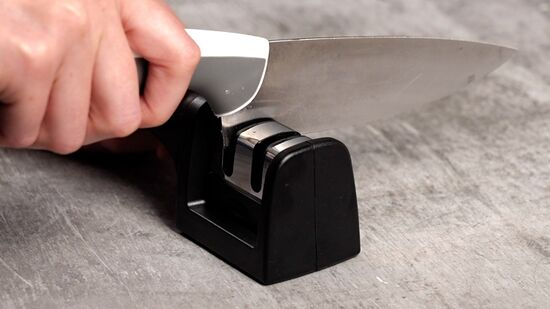
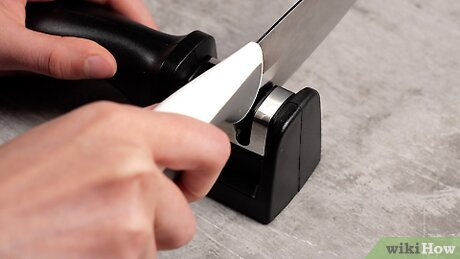
Step 1: Place the sharpener on a flat, non-slip surface. Hold it firmly with your non-dominant hand (many models have a non-slip base or suction cup).
Brush sharpener
A stable position is crucial for safety and consistent angles.
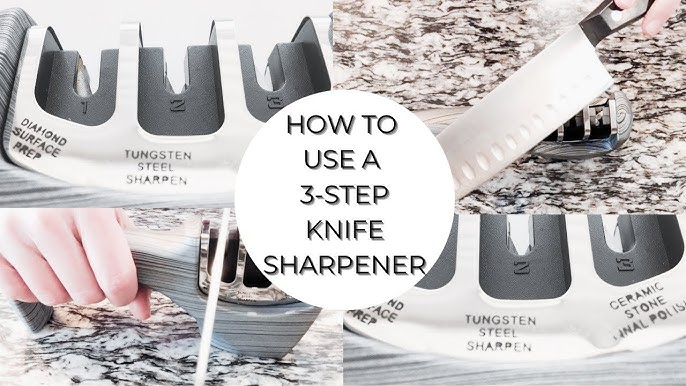
Step 2: First Step – Rough Stage (If your knife is very dull) Hold the handle comfortably. Place the heel (near the widest part of the handle) into the rough groove (usually marked or a left/right V-groove). Keep the knife vertically up and down – do not tilt it to the left or right.
How to Use a Knife Sharpener: A Quick and Simple Guide
Pull the blade straight back toward you from the base to the tip in a smooth, controlled motion. Use light to medium downward pressure.
Important note: Only pull – do not push the knife forward through the slot (this may damage the knife and sharpener).
Repeat 3-6 times on each side, alternating sides each time.
Step 3: Second Stage – Sharpening/Move the medium groove to a finer groove (usually the second or middle groove). Use the same pulling motion, but with slightly less pressure.
How to use a three-step knife sharpener/simple knife sharpener/three-step pull-type knife sharpener
Make 5-10 passes on each side alternately. You should start to feel and hear a more consistent scraping sound.
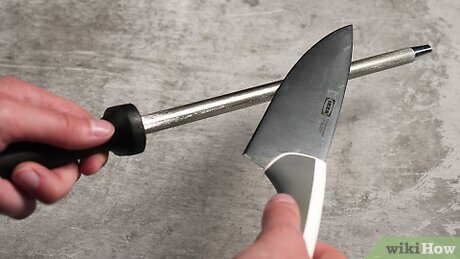
Step 4: Honing/Fine Stage (Polishing) Switch to the finest slot (if your sharpener has one). Use very light pressure - just let the weight of the knife do the work.
How to Use a Knife Sharpener: A Quick and Simple Guide
Perform 6-10 light passes on each side. This step removes fine wire edges (burrs) and produces cleaner, more lasting clarity.
Step 5: Test the edge and wipe the blade clean. Try one of the following safety tests:
· Gently shave arm hair (classic test)
· Cut a sheet of copy paper into neat slices from top to bottom.
· Cut the skin of a ripe tomato without any downward pressure.
How to Use a Knife Sharpener: A Quick and Simple Guide
A sharp knife easily cuts through paper—your goal!
Quick tips for getting the best results
· Always pull – never push the blade into the slot.
· Use a consistent, moderate speed (not too fast or too slow).
· After use, clean the metal dust from the slot (using a small brush or compressed air).
· Sharpen every 2-6 weeks, depending on your daily usage.
· If the knife still feels dull after multiple uses, the blade may need professional re-sharpening.
How to Use a Knife Sharpener: A Quick and Simple Guide
The final, minor adjustments—almost complete!
Safety Reminder
· Always keep the knife toward you—never toward the hand you're holding.
· Keep your fingers away from the blade path
· Never sharpen a knife in a wet or oily environment.
Now your knife is sharper, safer, and more enjoyable to use!
Ready to upgrade your sharpening game? Check out our best-selling pull-through sharpeners - worldwide fast shipping.
Happy Sharpening!